
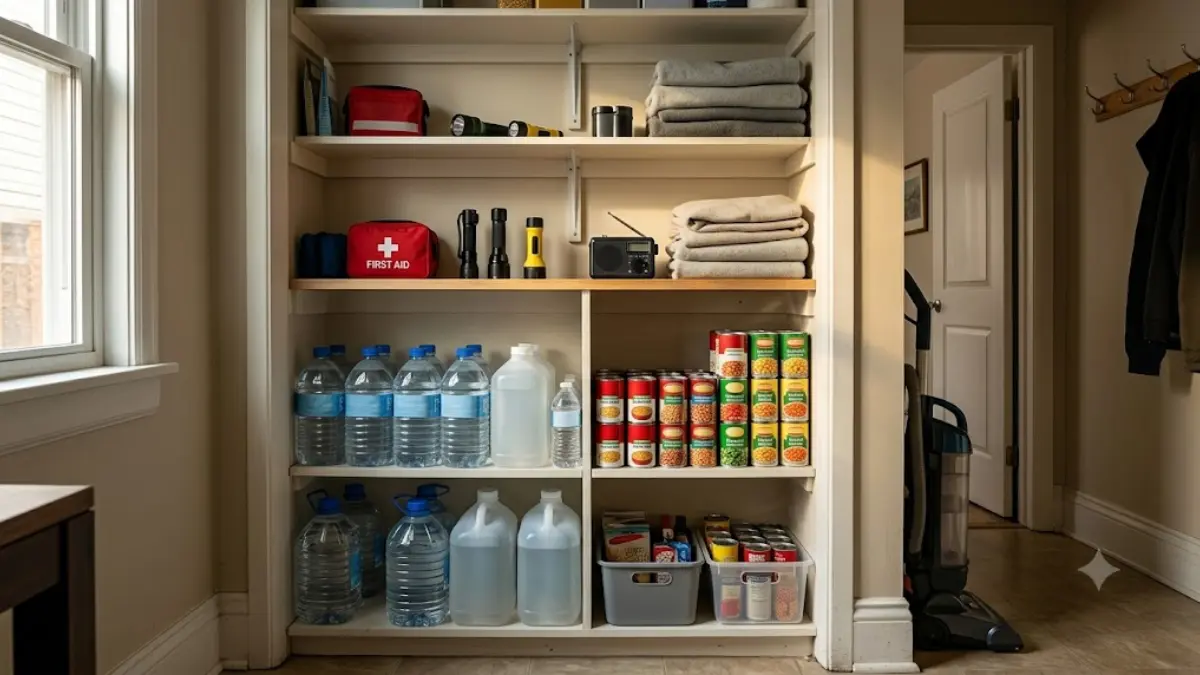
Living in a small apartment or compact home can make emergency preparedness feel challenging. Where do you keep extra drinking water, shelf-stable food, flashlights, first aid supplies, and other essentials when every closet and cabinet is already occupied?
Fortunately, emergency preparedness doesn’t require a large basement, garage, or dedicated storage room.
With thoughtful organization, compact containers, and a few practical storage habits, you can build a useful emergency supply system even in a studio apartment.
The key is to make your supplies accessible, safe, and easy to maintain without sacrificing valuable everyday living space.
This guide shares 11 practical ways to store emergency supplies in small spaces, including ideas for food, water, emergency equipment, and household essentials.
Get more insights on basic emergency supplies and portable emergency kits.
Why Emergency Supply Storage Is Different in Small Homes
Many traditional emergency preparedness guides assume households have ample storage space.
But apartment dwellers and people living in smaller homes often face different limitations:
- Limited closet and cabinet space.
- Little or no garage or basement storage.
- Restrictions on storing fuel or operating generators.
- Shared entrances, hallways, and evacuation routes.
- Limited capacity for storing large quantities of water.
- Difficulty organizing supplies without creating clutter.
These challenges don’t make preparedness impossible. They simply require a different approach.
Instead of buying large quantities of equipment at once, start with essential supplies and identify suitable storage locations.
A useful small-space system should meet three objectives: easy access, safe storage, and efficient use of space.
1. Start With a Compact Emergency Supply Plan
Before buying storage containers or reorganizing closets, determine what your household actually needs.
The US Federal Emergency Management Agency (FEMA) recommends keeping basic emergency supplies for at least three days, including water, nonperishable food, lighting, and other essentials.
A three-day supply provides a practical starting point for households with limited space. Expand it as your circumstances and storage space allow.
Begin with these essentials:
- Drinking water.
- Shelf-stable food.
- Flashlights and spare batteries.
- First aid supplies.
- Essential medications.
- Battery-powered or hand-crank radio.
- Phone charging equipment.
- Hygiene and sanitation supplies.
- Copies of important documents.
- Supplies for infants, older adults, or pets where applicable.
Avoid buying bulky equipment simply because it appears on a general preparedness list.
Choose supplies based on your household size, local risks, and available storage.
2. Use Under-Bed Storage for Lightweight Supplies
The space beneath a bed is often overlooked, especially in smaller apartments.
Low-profile storage containers can hold useful emergency items without taking up additional floor space.
Suitable items include:
- Extra blankets.
- Seasonal clothing.
- Spare towels.
- Packaged hygiene supplies.
- Lightweight emergency equipment.
Choose containers that fit comfortably under the bed and can be pulled out easily.
Clear plastic containers make contents easier to identify, while labeled opaque containers work just as well.
Avoid placing heavy water containers under beds if they are hard to retrieve or could damage the bed frame or flooring.
Also consider flood risks. Ground-level storage may be unsuitable in apartments prone to water intrusion.

3. Make Better Use of Closet Shelves
Closets can provide valuable emergency storage when items are arranged thoughtfully.
Use upper shelves for lightweight, infrequently accessed supplies such as extra blankets or spare clothing.
Keep heavier supplies on lower, structurally suitable shelves.
Small baskets or labeled containers can help separate categories:
- Lighting and batteries.
- First aid and hygiene.
- Emergency communications.
- Seasonal warmth supplies.
Do not overload shelves or stack heavy containers where they could fall.
Keep essential evacuation equipment within easy reach, not behind multiple boxes.
4. Store Emergency Water in Smaller Containers
Water storage is one of the biggest challenges in a small home because water is both bulky and heavy.
The Centers for Disease Control and Prevention (CDC) recommends storing at least one gallon of water per person per day for at least three days.
For example:
| Household size | Three-day minimum |
|---|---|
| 1 person | 3 gallons |
| 2 people | 6 gallons |
| 3 people | 9 gallons |
| 4 people | 12 gallons |
These are starting quantities. Some households need additional water because of health conditions, pets, climate, or other circumstances.
For help calculating your household’s requirements, see our guide on how much emergency water to store at home, including practical quantities and container considerations.

Once you know how much emergency water to store, the next step is to assemble a budget-friendly home emergency kit with food, lighting, and other basic supplies.
Choose manageable containers
Instead of relying entirely on one large container, consider several smaller, sealed, food-grade water containers.
Smaller containers can be easier to move, distribute, and fit into available storage areas.
Store water:
- In a cool location.
- Away from direct sunlight.
- Away from household chemicals.
- In properly sealed, food-safe containers.
- On a stable surface that can support the weight.
One gallon of water weighs approximately 8.3 pounds, excluding the container.
A four-person household’s basic three-day supply of 12 gallons therefore weighs about 100 pounds.
Distribute this weight appropriately rather than placing it on weak shelves or furniture.
If you fill your own water containers, follow CDC cleaning and sanitizing guidance and replace stored water every six months.
Follow the expiration or storage instructions for commercially bottled water.
Important: Don’t assume that balconies, suspended shelves, or elevated furniture can safely support large water reserves. Follow building rules and obtain advice if you’re uncertain about structural loading.
5. Organize Emergency Food in Your Existing Pantry
A separate emergency food cupboard helps but isn’t essential.
You can integrate suitable emergency foods into your normal kitchen storage.
Choose shelf-stable foods that your household already eats, such as:
- Canned beans and vegetables.
- Canned fish or meat.
- Peanut butter.
- Crackers.
- Ready-to-eat cereals.
- Dried fruit.
- Shelf-stable packaged meals.
Prioritize foods that require little or no cooking, especially if your apartment relies on an electric stove.
Use the oldest suitable items first and replace them during regular grocery shopping.
This approach reduces waste and prevents your emergency food supply from becoming a collection of forgotten products.
Keep food away from heat, moisture, cleaning chemicals, and pests.
If you want to expand your pantry gradually, our 7-day emergency food supply on a budget guide offers practical shopping and meal-planning ideas.

6. Use Vertical Storage Without Creating Hazards
Vertical storage can help make better use of limited floor space.
Suitable options include:
- Securely installed wall shelves.
- Over-door organizers.
- Closet hanging organizers.
- Stackable containers.
- Narrow shelving units.
However, approach vertical storage carefully.
Keep heavy items low, secure tall furniture against tipping where appropriate, and avoid blocking sprinklers, ventilation, electrical panels, or escape routes.
In earthquake-prone regions, unsecured shelves and stacked containers can become dangerous.
Do not place emergency supplies in common apartment hallways or stairwells.
A clear exit route is more important than maximizing storage capacity.
7. Keep a Grab-and-Go Emergency Bag Near an Exit
Not every emergency is one you can stay at home for.
Apartment residents may need to evacuate because of fire, flooding, severe weather, or building damage.
Prepare a compact emergency bag that’s easy to carry.
Consider including:
- A flashlight.
- Essential contact information.
- Copies of important documents.
- Necessary medications or a medication plan.
- A small first aid kit.
- A phone charging cable and power bank.
- A small amount of drinking water.
- Weather-appropriate clothing.
Store the bag somewhere easy to reach, but not blocking the doorway.
Avoid making it so heavy that household members cannot carry it safely.
A grab-and-go bag is not a substitute for the larger supplies kept at home. It serves a different purpose: helping you leave quickly when necessary.

8. Separate Everyday Supplies From Emergency-Only Items
Some emergency supplies can be used and replaced as part of everyday household routines.
Examples include canned food, batteries, hygiene products, and bottled water.
Other items may be reserved primarily for emergencies, such as a hand-crank radio or specialized emergency lighting.
Keeping these two groups organized helps prevent confusion.
For example, you might maintain:
Everyday rotation supplies: Food, water, toiletries, and regularly used consumables.
Emergency equipment: Flashlights, radio, first aid equipment, documents, and backup charging devices.
Label containers clearly so everyone knows where to find important items.
9. Store Batteries and Power Banks Safely
Power banks and rechargeable emergency lighting can be valuable during electricity outages.
However, lithium-ion batteries require appropriate storage and handling.
Store them in a cool, dry location away from direct sunlight and combustible materials.
Follow manufacturer instructions for charging and maintenance.
Avoid using damaged, swollen, leaking, or unusually hot batteries.
Do not charge devices where they could block an exit or escape route.
The US Fire Administration recommends selecting appropriately certified products and following manufacturer guidance for safe battery use and storage.
Check rechargeable devices periodically so they are ready when needed.
10. Create a Simple Emergency Storage Inventory
A small inventory can prevent unnecessary purchases and help you find supplies quickly.
You don’t need complicated software.
A notebook, printed sheet, or simple spreadsheet is sufficient.
Record:
- Item name.
- Quantity.
- Storage location.
- Expiration or replacement date.
- Date last checked.
For example:
| Item | Quantity | Location | Next check |
|---|---|---|---|
| Drinking water | 6 gallons | Pantry floor | April |
| Canned food | 12 cans | Kitchen cupboard | January |
| Flashlights | 2 | Hall closet | January |
| First aid kit | 1 | Bedroom drawer | January |
| Power bank | 1 | Emergency bag | Monthly |
These quantities are illustrative, not a complete household emergency supply recommendation.
Review your inventory every few months and after using emergency supplies.
A simple, regularly maintained system is more useful than an elaborate one that becomes outdated.
11. Build Your Emergency Storage System Gradually
You don’t need to organize everything in one weekend.
A gradual approach makes emergency preparedness more affordable and manageable.
Week 1: Identify available storage
Inspect closets, under-bed areas, kitchen cupboards, and suitable shelving.
Remove unnecessary clutter and identify safe storage locations.
Week 2: Organize essential supplies
Gather existing flashlights, first aid items, water containers, and shelf-stable foods.
Place them in clearly identified locations.
Week 3: Improve storage efficiency
Add suitable containers, labels, or organizers if needed.
Avoid buying storage accessories before confirming their dimensions and usefulness.
Week 4: Review and test the system
Check whether household members can find important items quickly.
Make sure exits remain clear, and containers can be retrieved safely.
Create a short inventory and establish a recurring review schedule.
Practical Storage Examples for Different Homes
Studio apartment
A studio resident might use one low-profile under-bed container for blankets and hygiene items, a lower kitchen cabinet for emergency food and water, and a compact emergency bag near the exit.
The goal is to avoid clutter while keeping essential supplies accessible.
One-bedroom apartment
A one-bedroom home may offer additional closet storage.
Consider using one closet shelf for lighting and first aid supplies, under-bed storage for lightweight items, and a suitable pantry area for water and food.
Small family apartment
A family may need more supplies and a more robust system for distributing them.
Store water in manageable containers at safe locations, keep frequently needed items accessible, and ensure that adults know where essential supplies are kept.
Teach children where emergency lighting is located without giving them unsupervised access to hazardous equipment or medications.
Common Emergency Storage Mistakes to Avoid
Even a well-intentioned storage system can become ineffective if basic safety and organization are overlooked.
Overloading shelves: Heavy water containers and canned goods can damage unsuitable furniture or cause injuries.
Blocking exits: Emergency supplies should never obstruct doors, corridors, or evacuation routes.
Storing everything in one inaccessible location: A single locked or cluttered cupboard may become difficult to reach during an emergency.
Ignoring expiration dates: Review food, medication, and other supplies periodically.
Keeping batteries in hot locations: Excessive heat can damage rechargeable batteries and increase safety risks.
Buying too much too quickly: Purchasing large quantities without a storage plan can create clutter and waste.
Frequently Asked Questions
Where should I store emergency supplies in a small apartment?
Use a combination of accessible closet shelves, lower kitchen cabinets, under-bed containers, and a designated emergency bag. Keep heavy items low and exits clear.
How much emergency water should I store in an apartment?
Start with at least one gallon per person per day for three days, following CDC guidance. Expand your supply when space and circumstances permit.
Can I store emergency supplies under my bed?
Yes, as long as the area is dry, accessible, and suitable for the items stored. Lightweight bedding and hygiene supplies are often better choices than heavy water containers.
Should I keep all emergency supplies in one container?
Not necessary. A compact grab-and-go kit is useful, but distribute heavier household supplies among appropriate storage locations for easier management.
How often should I check emergency supplies?
Review them every few months and after use. Check food dates, water storage requirements, battery condition, and changes in household needs.
What if I have almost no storage space?
Begin with a compact evacuation kit and a manageable supply of water, food, and essential equipment. Use existing storage more efficiently and expand gradually without compromising household safety.
Conclusion
Emergency preparedness in a small home is primarily an organization challenge, not a space requirement.
You can build a useful emergency supply system by choosing essential items, using overlooked storage areas, keeping heavy supplies low, and maintaining a simple inventory.
Before organizing your storage areas, use our emergency supplies checklist to identify the essential items your household should prioritize.
Start with a realistic three-day supply, organize it safely, and expand as your available space and budget allow.
The most effective emergency supplies are not necessarily the largest collection of products. They are the supplies your household can find, access, and use when you need them most.