
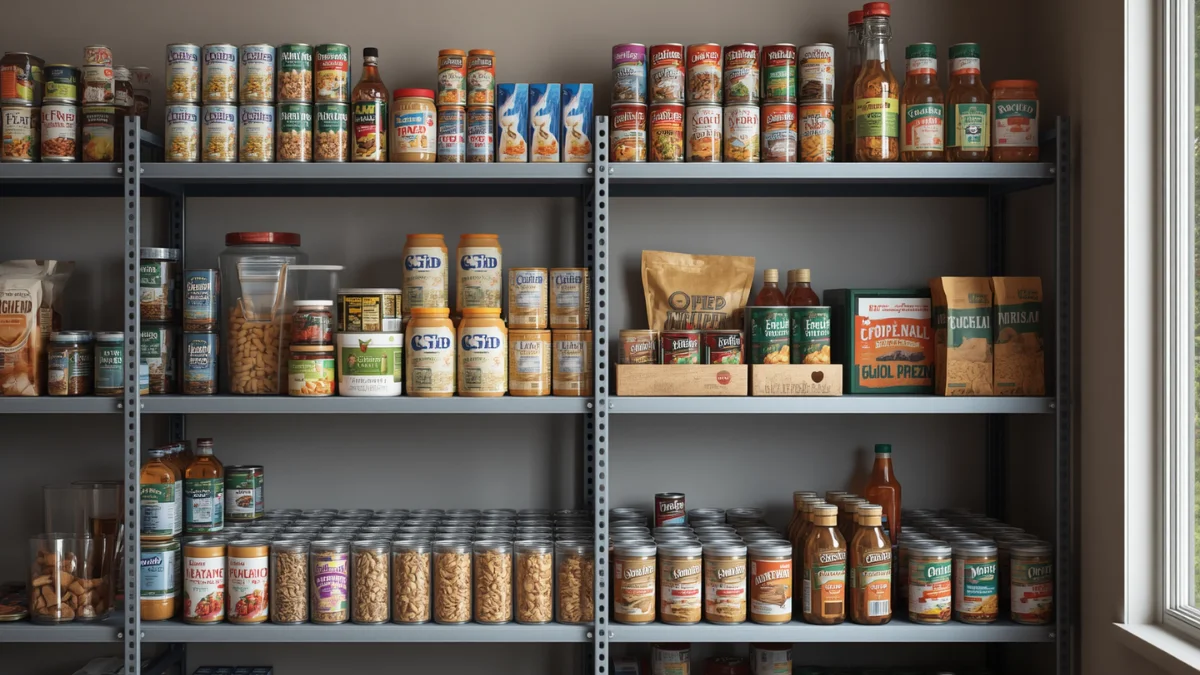
An unexpected power outage, severe storm, flood, or temporary disruption to local stores can make everyday food shopping difficult. Even when an emergency lasts only a few days, having enough food at home can make a significant difference to your household’s comfort and safety.
The good news is that building an emergency food supply doesn’t have to be expensive or complicated.
You don’t need a basement filled with survival meals, specialized equipment, or months of food storage. For most beginners, the sensible approach is to start with familiar, shelf-stable groceries that your family already enjoys.
A small, well-planned emergency pantry can help you prepare meals when electricity is unavailable, refrigeration is limited, or grocery shopping is temporarily impossible.
In this guide, you’ll learn how much emergency food to store, which foods are most useful, how to calculate quantities for your household, and how to build a practical supply without unnecessary spending.
If you’re new to preparedness, our Household Emergency Preparedness: A Complete Beginner’s Guide explains how food storage fits into a broader household emergency plan.
How Much Emergency Food Should You Store?
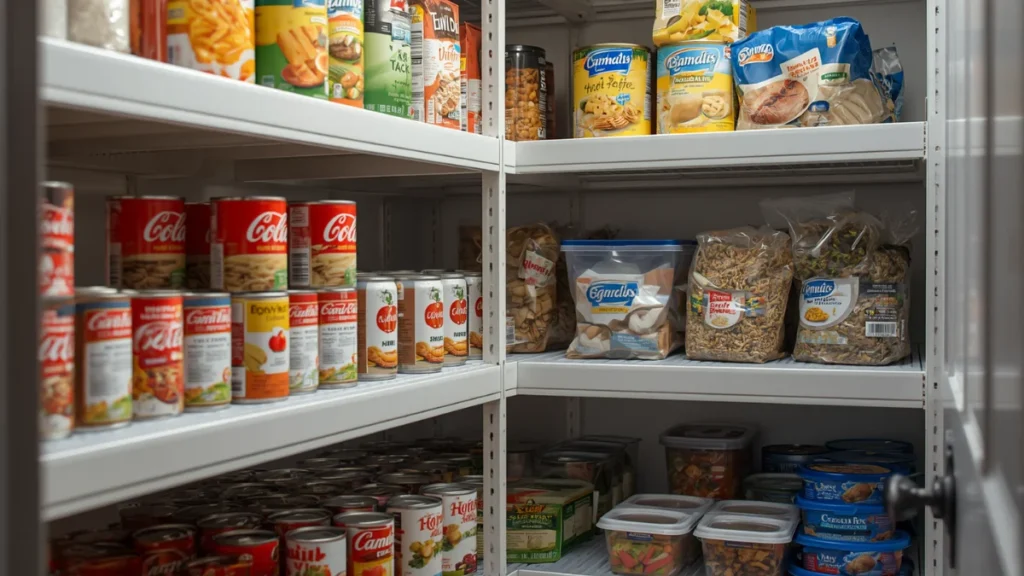
A useful starting point is enough nonperishable food to feed every household member for at least three days.
The US government’s Ready.gov emergency kit guidance recommends maintaining a supply of nonperishable food lasting several days. For households preparing for longer disruptions, a larger reserve may be appropriate.
Rather than building a substantial stockpile immediately, consider a gradual approach.
Start With a Three-Day Emergency Food Supply
A three-day reserve provides a practical foundation for beginners.
For example, a household with two adults could plan for:
- Three breakfasts for each person
- Three lunches for each person
- Three dinners for each person
- Suitable snacks and additional food as needed
- Enough safe drinking water for the household
That represents six person-days of meals, or 18 individual meal portions, before accounting for snacks.
The food should provide adequate energy and nutrition, not merely enough individual packages to count as meals.
Expand Toward Seven Days
Once you have established a three-day supply, you can gradually extend it to one week.
This provides additional flexibility during extended power outages, severe weather, supply interruptions, or situations where travel becomes difficult.
You can assemble a seven-day reserve from many ordinary pantry foods, including canned beans, fish, vegetables, fruit, crackers, nut butters, and shelf-stable milk.
Consider a Two-Week Reserve
Households exposed to hurricanes, winter storms, wildfires, or other hazards that may disrupt essential services for longer periods may wish to plan for approximately two weeks of food.
A two-week reserve requires more attention to variety, nutrition, storage conditions, and household preferences.
The right target depends on your circumstances.
For beginners, the most important goal is to establish a reliable three-day supply and expand it gradually.
Growing some of your own food can be a practical introduction to self-sufficiency; our small backyard vegetable garden guide explains how to get started.
Emergency Food Quantity Calculator: How Much Does Your Household Need?
Unlike drinking water, emergency food cannot be calculated using one universal quantity per person.
Different foods provide different amounts of energy and nutrition.
A can of vegetables, a package of crackers, and a jar of peanut butter aren’t equivalent just because each counts as one item.
Instead, begin by calculating the number of person-days you need to cover.
Household members × Number of days = Total person-days of food
For planning purposes, the following table shows the number of individual meal portions needed if each person eats three meals daily.
| Household size | 3 days | 7 days | 14 days |
|---|---|---|---|
| 1 person | 9 meals | 21 meals | 42 meals |
| 2 people | 18 meals | 42 meals | 84 meals |
| 3 people | 27 meals | 63 meals | 126 meals |
| 4 people | 36 meals | 84 meals | 168 meals |
| 5 people | 45 meals | 105 meals | 210 meals |
| 6 people | 54 meals | 126 meals | 252 meals |
These figures count meal portions, not cans, packages, or calories. Each meal must still contain enough food for the person eating it.
Example: A Family of Four
Suppose your household includes two adults and two school-age children.
For three days, you would plan for:
- 12 breakfasts
- 12 lunches
- 12 dinners
- Additional snacks and suitable drinks
That means 36 individual meal portions.
However, children’s nutritional needs and serving sizes may differ from adults’.
A more accurate shopping list should account for ages, usual portion sizes, dietary restrictions, and the actual number of servings in each package.
Don’t Forget Calories and Nutrition
Emergency food should provide sufficient energy for normal activities and the demands of the situation.
Adults and children have different calorie requirements, and needs vary with age, body size, activity, and health.
Rather than using a single calorie target for everyone, consider your household members’ normal nutritional needs.
Try to include a reasonable balance of:
- Carbohydrates for energy
- Protein-rich foods
- Dietary fats
- Fruits and vegetables
- Foods that provide fiber and important nutrients
For a short disruption, familiar foods that people will actually eat are generally more useful than an elaborate supply of unfamiliar emergency products.
What Foods Are Best for an Emergency Food Supply?
The most useful emergency foods are those that remain safe without refrigeration, require little preparation, and fit your household’s normal eating habits.
When choosing foods, consider five practical characteristics.
1. Long Shelf Life
Choose foods that can be stored safely at room temperature when unopened, following the packaging and storage instructions.
Examples include canned beans, canned fish, commercially canned vegetables, dry crackers, and certain packaged grains.
Shelf life varies considerably by product and packaging.
Always check the container’s condition and follow applicable storage guidance.
2. Little or No Cooking Required
Power outages may make electric stoves, microwaves, and other cooking appliances unusable.
Some households may also temporarily lose access to safe cooking water.
Ready-to-eat foods can be especially valuable.
Examples include:
- Canned tuna, salmon, or chicken
- Ready-to-eat canned beans
- Peanut butter or other suitable nut and seed butters
- Crackers and crispbread
- Canned fruit
- Shelf-stable milk in individual cartons
- Ready-to-eat cereals
- Suitable packaged snacks
Check labels carefully. Some canned foods are ready to eat, while others may need heating or additional preparation.
3. Foods Your Family Already Eats
An emergency is not the ideal time to introduce an entirely unfamiliar diet.
Children may reject unusual foods, and adults may find unfamiliar products difficult to prepare.
Whenever possible, select foods that are already part of your household’s routine.
This also makes rotation easier because you can use older supplies during normal meals and replace them with fresh purchases.
4. Easy-to-Open Packaging
Canned food is useful, but not every can has a pull-tab lid.
Keep a reliable manual can opener with your emergency supplies.
If a household member has limited hand strength or mobility, consider packaging that they can open independently.
5. Reasonable Nutritional Variety
An emergency pantry made entirely of crackers, candy, and snack bars may provide calories but little nutritional variety.
Aim to include protein, carbohydrates, fruits, vegetables, and other foods appropriate to your family’s needs.
Even a basic three-day reserve can provide a useful mixture of food groups.
Emergency Food Supply List for Beginners
The following categories provide a practical starting point for shopping.
Protein-Rich Foods
Protein-rich foods help make meals more satisfying and support everyday nutritional needs.
Useful choices include:
- Canned tuna or salmon
- Canned chicken
- Ready-to-eat canned beans
- Canned lentils
- Peanut butter
- Shelf-stable packaged protein foods
Choose foods that meet your household’s dietary preferences and allergy requirements.
Grains and Carbohydrates
Grains and other carbohydrate-rich foods can provide convenient energy.
Examples include:
- Crackers
- Crispbread
- Ready-to-eat cereal
- Granola
- Shelf-stable tortillas
- Instant oatmeal, if safe water and heating are available
- Rice or pasta, if you have a safe and reliable way to cook them
For an emergency involving loss of electricity or cooking facilities, prioritize foods that can be eaten without heating.
Fruits and Vegetables
Fruits and vegetables add variety and important nutrients.
Options include:
- Canned peaches, pears, or pineapple
- Unsweetened applesauce
- Canned carrots, peas, or green beans
- Canned corn
- Dried fruit
- Shelf-stable fruit cups
Select packaging that can be stored safely and opened easily.
Milk and Other Beverages
Depending on household preferences, consider:
- Shelf-stable UHT milk
- Suitable shelf-stable plant-based beverages
- Powdered milk, if safe water is available
- Other beverages appropriate to household needs
These drinks can supplement your food supply, but they should not replace your planned emergency drinking-water reserve.
For water calculations and storage recommendations, see our How Much Emergency Water Should You Store at Home? guide.
Convenient Snacks
Snacks can provide additional energy and help maintain familiar eating routines.
Options include:
- Granola bars
- Trail mix
- Nuts and seeds
- Dried fruit
- Crackers
- Other shelf-stable snacks
Remember to check for allergies, especially when storing foods for children.
Sample Three-Day Emergency Food Plan for Two Adults

The following example illustrates how a small household might organize ordinary shelf-stable foods into a three-day emergency menu.
It assumes that refrigeration and electric cooking may be unavailable.
The plan is intentionally simple. Adjust quantities to each person’s energy needs, appetite, and dietary requirements.
| Day | Breakfast | Lunch | Dinner |
|---|---|---|---|
| Day 1 | Ready-to-eat cereal, shelf-stable milk, dried fruit | Canned tuna with crackers and canned fruit | Ready-to-eat canned beans, shelf-stable tortillas, canned vegetables |
| Day 2 | Granola, peanut butter, shelf-stable milk | Canned chicken with crackers and fruit cups | Ready-to-eat canned lentils, crackers, canned vegetables |
| Day 3 | Ready-to-eat cereal, nuts, dried fruit | Peanut butter with crackers and applesauce | Canned salmon or beans, shelf-stable tortillas, canned vegetables |
Include suitable snacks and additional portions throughout the day.
Example Shopping List for This Three-Day Plan
For two adults, a possible starting shopping list includes:
| Food | Illustrative quantity |
|---|---|
| Ready-to-eat cereal or granola | 1–2 packages |
| Shelf-stable milk | Enough for six breakfast servings and any additional use |
| Canned tuna, salmon, or chicken | Approximately 4–6 cans or pouches, depending on serving size |
| Ready-to-eat canned beans or lentils | Approximately 4–6 cans, depending on size and meal portions |
| Crackers or crispbread | 2 packages |
| Shelf-stable tortillas | 1 package |
| Canned vegetables | 3–4 cans |
| Canned fruit, fruit cups, or applesauce | Enough for six or more servings |
| Peanut butter | 1 jar |
| Nuts, dried fruit, or granola bars | Enough for planned snacks |
Important: These quantities are an illustrative shopping framework, not a nutritionally complete ration or a guarantee of sufficient calories. Check the servings and nutritional information on the products you purchase, and increase quantities as needed.
Some households will require considerably more food, especially when members have higher energy needs.
Three Practical Lessons From This Meal Plan
First, choose foods that can be eaten without cooking. A plan based entirely on dry rice, pasta, or beans may be difficult to use if electricity, fuel, or safe water for preparation is unavailable.
Second, plan complete meals rather than simply counting packages. Having 20 cans in a cupboard doesn’t necessarily mean you have enough food for 20 meals.
Third, store foods you can rotate into everyday use. A practical emergency pantry can be part of your regular grocery routine rather than a separate collection of products that remain untouched for years.
The goal is not to create a perfect emergency menu. It is to ensure your household has sufficient, safe, familiar food when normal shopping and cooking routines are disrupted.
How to Calculate Emergency Food Quantities for Your Family
Knowing that you need three days or one week of food is only the beginning.
The next step is determining how much food your household will actually consume during that period.
One common mistake is counting cans or packages without checking how many servings they contain.
A small can of tuna may provide one substantial serving, while a large can of beans might provide several smaller servings. Likewise, a box of crackers may contain many individual portions but cannot necessarily replace a balanced meal.
A practical calculation should consider household size, daily meals, serving sizes, and nutritional requirements.
Step 1: Count Everyone Who Depends on Your Food Supply
Include all household members, including children and older adults.
Also consider whether relatives or other dependents may stay with you during an emergency.
If you have pets, calculate their food requirements separately.
Step 2: Estimate Daily Food Requirements
Begin with the meals and snacks your family normally consumes.
For each person, consider:
- Three regular meals, or their usual eating pattern
- Snacks or additional food where needed
- Appropriate sources of protein, carbohydrates, and fats
- Fruits, vegetables, and other foods that contribute to nutritional variety
- Special dietary or medical requirements
There is no single calorie requirement that suits everyone.
Energy needs vary with age, activity, body size, and individual circumstances.
Use the nutrition information on food packages to determine whether your planned portions are adequate.
Step 3: Calculate Total Servings
Suppose your family has four members and you want a seven-day emergency food supply.
If everyone normally eats three meals daily:
4 people × 7 days × 3 meals = 84 individual meal portions
This does not mean you need 84 cans or packages.
A single package may provide several servings, while one meal may require multiple foods.
For example, a lunch could include canned chicken, crackers, fruit, and a suitable drink.
Count the servings of each component when preparing your shopping list.
Step 4: Check the Actual Package Sizes
Two products with similar packaging may contain very different quantities.
Before purchasing, check:
- Net weight
- Number of servings
- Serving size
- Calories per serving
- Preparation requirements
- Storage instructions
- Allergen information
These details help you avoid overestimating how much food you have stored.
Step 5: Add Some Flexibility
A rigid meal plan can become inconvenient if an emergency lasts longer than expected or a particular food becomes unusable.
Where your budget and space allow, keep some additional ready-to-eat foods and snacks.
However, avoid purchasing excessive quantities of foods your household rarely eats.
The goal is a dependable food supply you can maintain and use.
Emergency Foods That Require Little or No Cooking
During a prolonged power outage, cooking may become one of the biggest challenges.
Electric stoves, microwaves, and refrigerators may be unavailable.
Gas appliances may also be unusable or unsafe under certain emergency conditions.
That makes no-cook foods an important part of household preparedness.
Reference: Ready.gov — Emergency Supply Kit
Ready-to-Eat Protein Foods
Commercially canned fish, chicken, beans, and certain other foods can provide useful protein without requiring cooking.
Check the packaging to confirm that the product is fully cooked and ready to eat.
If a can contains more than you can consume at one meal, remember that leftovers generally require refrigeration.
When refrigeration is unavailable, smaller packages may be more practical.
Crackers, Cereals, and Other Ready-to-Eat Grains
Crackers, crispbread, ready-to-eat cereals, and similar foods can provide convenient energy.
They also combine easily with peanut butter, canned fish, or other protein-rich foods.
Choose products that store at room temperature and require no additional preparation.
Canned Fruits and Vegetables
Many commercially canned fruits and vegetables can be eaten without heating.
They can add variety and useful nutrients to emergency meals.
Choose manageable package sizes, especially when refrigeration is unavailable.
Nuts, Seeds, and Nut Butters
Nuts, seeds, and suitable nut butters provide energy in relatively compact portions.
They may be especially useful as snacks or additions to simple meals.
Always account for food allergies and the needs of young children.
Shelf-Stable Milk and Beverages
Unopened UHT milk and certain shelf-stable beverages can be useful when refrigeration is unavailable.
However, many require refrigeration after opening.
Consider smaller cartons that can be consumed promptly.
What About Rice, Pasta, and Dried Beans?
These foods are useful for longer-term pantry storage, but most require cooking.
Rice and pasta generally need safe water and a heat source. Dried beans usually require soaking or substantial cooking.
If your emergency food supply depends on these foods, you must also have a safe, realistic preparation plan.
For beginners, a mixture of ready-to-eat foods and foods requiring minimal preparation is often more practical than relying entirely on dry staples.
How to Store Emergency Food Safely at Home
Buying suitable food is only half the task.
Proper storage helps protect its quality and reduces the risk of contamination or spoilage.
Choose a Cool, Dry Storage Location
Store most shelf-stable emergency foods in a clean, dry location away from excessive heat, moisture, and direct sunlight.
A pantry, cupboard, or suitable indoor storage area may work well.
Follow the storage instructions on each product.
Avoid locations exposed to frequent temperature extremes, flooding, or household chemicals.
Protect Food From Moisture and Pests
Damaged packaging can allow moisture, insects, or rodents to reach stored food.
Keep food in intact packaging and regularly inspect storage areas.
For dry foods, suitable sealed containers can provide additional protection, but they do not make foods safe indefinitely.
Never assume that repackaging a product automatically extends its safe storage life.
Keep Food Away From Chemicals
Do not store food beside pesticides, fuels, cleaning products, or other hazardous substances.
Chemical spills, fumes, or damaged packaging can create contamination risks.
Choose a dedicated food-storage area wherever possible.
Inspect Cans and Packages
Before using stored food, check its packaging carefully.
Discard food from cans that are leaking, bulging, badly rusted, or severely dented, particularly around seams.
Do not taste food to determine whether it is safe.
Food contaminated with dangerous microorganisms may not have an unusual smell or appearance.
Store Food Where It Can Be Reached Easily
During an emergency, you may need to locate food in poor lighting or under stressful conditions.
Keep your supplies reasonably organized.
Place heavier items on sturdy lower shelves and avoid blocking doors or exits.
A simple inventory can help you identify what you have and what needs replacing.
How Long Does Emergency Food Last?
No single shelf life applies to every emergency food.
Storage life depends on the food type, packaging, processing method, and storage conditions.
Commercially canned foods, dry grains, crackers, nuts, and shelf-stable beverages can have very different storage characteristics.
Understanding Best-By Dates
Many packaged foods carry a best-by or best-if-used-by date.
For most shelf-stable foods in the United States, these dates generally indicate the manufacturer’s estimate of peak quality rather than an automatic food-safety expiration date.
However, this does not mean food remains safe under every storage condition or indefinitely.
Packaging damage, contamination, improper storage, and product-specific requirements still matter.
Follow manufacturer instructions and official food-safety guidance.
Typical Storage Considerations
| Food category | Storage considerations |
|---|---|
| Commercially canned beans, meat, or fish | Often suitable for extended pantry storage when unopened and properly stored; inspect cans |
| Canned tomatoes and other high-acid foods | Generally have a shorter quality-storage period than many low-acid canned foods |
| Dry rice and pasta | Store in dry conditions; shelf life depends on packaging and product type |
| Crackers and cereals | Quality can decline as products become stale or absorb moisture |
| Nuts and nut butters | Oils can become rancid; follow package dates and storage instructions |
| Shelf-stable milk | Follow the manufacturer’s unopened-storage and after-opening instructions |
| Dried fruit | Protect from moisture and heat; follow package guidance |
This table is intended to help with planning, not to replace product-specific instructions.
Use the First-In, First-Out Method
A simple food-rotation system can prevent waste.
The principle is straightforward:
Use older suitable products first and place newer purchases behind them.
For example, if you buy canned beans for emergency storage in January and add more in April, use the older cans first for everyday meals.
Replace items as you consume them so your emergency reserve remains available.
Review Your Emergency Pantry Twice a Year
Consider inspecting your emergency food supply every six months.
Check for:
- Damaged cans or packaging
- Foods approaching their recommended quality dates
- Evidence of moisture or pests
- Changes in household dietary needs
- Missing items
- Foods that require replacement
A short, periodic review is usually easier than inspecting a large, disorganized stockpile after several years.
Reference: USDA — Shelf-Stable Food Safety
Emergency Food Safety During a Power Outage
A power outage can affect both your emergency pantry and the food already stored in your refrigerator or freezer.
Understanding the difference is important.
Properly stored shelf-stable foods generally do not depend on electricity.
Refrigerated and frozen foods, however, require careful attention to time and temperature.
How Long Will Refrigerated Food Stay Safe?
According to FoodSafety.gov, a refrigerator generally keeps food safe for about four hours during a power outage if the door remains closed.
After that period, perishable refrigerated foods may need to be discarded, depending on their temperature and the circumstances.
Do not rely on appearance, smell, or taste to judge safety.
How Long Will Frozen Food Stay Safe?
An unopened, fully stocked freezer can generally maintain a safe temperature for approximately 48 hours.
A half-full freezer may maintain a safe temperature for approximately 24 hours.
These estimates assume that the freezer door remains closed.
Actual conditions vary.
Frozen foods that still contain ice crystals or have remained at 40°F (4°C) or below may sometimes be safely cooked or refrozen, depending on the food and applicable guidance.
Avoid Unnecessary Door Opening
During a power outage, keep refrigerator and freezer doors closed as much as possible.
Opening them repeatedly lets cold air escape and can shorten the time food stays at safe temperatures.
Do Not Use Outdoor Conditions as a Substitute for Safe Refrigeration
Cold weather does not automatically make an outdoor location safe for storing perishable food.
Temperatures may fluctuate, and food may be exposed to animals, sunlight, or contamination.
Follow official food-safety recommendations rather than relying on outdoor conditions alone.
Never Use Outdoor Cooking Equipment Indoors
Portable camping stoves, charcoal grills, and fuel-burning generators can create serious carbon monoxide hazards.
Never use charcoal grills, camping stoves, or generators inside a home, garage, enclosed porch, or other enclosed or partially enclosed space.
Use cooking equipment only according to manufacturer instructions and applicable safety guidance.
For this reason, a supply of foods that can be eaten without cooking is especially valuable.
What If Floodwater Reaches Your Food?
Floodwater may contain sewage, chemicals, and harmful microorganisms.
Discard food that has come into contact with floodwater unless official guidance specifically identifies a safe method of recovering that type of commercially packaged food.
Food in cardboard boxes, paper packaging, screw-cap containers, and many other types of packaging can become unsafe after flood exposure.
Never assume that a sealed-looking package is automatically safe.
For detailed instructions, consult FoodSafety.gov or your local public health authority.
Reference: FoodSafety.gov — Food Safety in a Disaster or Emergency
A Simple Emergency Food Storage Routine
You don’t need a complicated inventory system to maintain a small emergency pantry.
A practical routine could look like this:
Every month: Use and replace suitable older items during normal grocery shopping.
Every six months: Inspect packaging, check storage conditions, and review your household’s food requirements.
Once a year: Recalculate your emergency food target and consider whether local risks or household circumstances justify expanding the reserve.
Keep the process simple enough to maintain consistently.
The purpose of emergency food storage is not merely to collect supplies. It is to keep a dependable source of safe, usable food available when ordinary routines are disrupted.
How to Build an Emergency Food Supply on a Budget

Building an emergency food supply doesn’t require purchasing expensive survival food kits or filling an entire storage room.
For most beginners, a more affordable approach is to purchase a few additional shelf-stable groceries during regular shopping trips.
The objective is to create a dependable reserve without putting unnecessary pressure on your household budget.
Step 1: Check What You Already Have
Before buying anything, inspect your pantry.
You may already have suitable emergency foods, including canned beans, canned fish, crackers, peanut butter, cereal, or canned vegetables.
Check the condition, storage instructions, and usable quantities of these products.
Make a simple list of what you already have and what is missing.
This prevents duplicate purchases and helps you identify your most immediate needs.
Step 2: Build a Three-Day Supply First
Calculate the food your household needs for three days.
Start with foods you can eat without refrigeration or cooking.
For example, you might purchase:
- A few cans of ready-to-eat beans
- Canned tuna or chicken
- Crackers or crispbread
- Peanut butter
- Canned fruits and vegetables
- Ready-to-eat cereal
- Shelf-stable milk
- Suitable snacks
Choose quantities based on the number of people in your household and their usual nutritional needs.
You don’t need to buy everything in one shopping trip.
Step 3: Add a Few Items Each Week
A gradual purchasing plan can make emergency preparedness more affordable.
For example:
| Week | Suggested purchases |
|---|---|
| Week 1 | Ready-to-eat canned proteins and beans |
| Week 2 | Crackers, cereal, and other ready-to-eat grains |
| Week 3 | Canned fruits, vegetables, and shelf-stable beverages |
| Week 4 | Nut butters, suitable snacks, and any missing items |
This is an example, not a complete ration plan. Check your household’s total food requirements and the actual servings per package before considering the supply complete.
Step 4: Choose Store Brands When Appropriate
Store-brand canned foods, cereals, and other shelf-stable groceries may cost less than comparable branded products.
Compare prices per ounce or per serving rather than the package price alone.
Check ingredient lists, nutrition labels, packaging condition, and storage instructions.
The cheapest product is not necessarily the best value if your family dislikes it or cannot use it.
Step 5: Expand Gradually
Once you have enough food for three days, consider expanding your reserve toward seven days.
A longer supply may be particularly useful in areas exposed to severe storms, prolonged winter weather, or other disruptions.
However, avoid purchasing more food than you can store and rotate properly.
The most economical emergency pantry is often one built from ordinary foods that your household already uses.
Emergency Food Planning for Special Dietary Needs
A household emergency food supply should reflect the needs of the people who will depend on it.
A standard shopping list may not suit everyone.
Babies and Young Children
Families with infants may need appropriate formula, feeding supplies, and age-appropriate foods.
Ready-to-feed infant formula can be especially useful when safe water or sterilization facilities are unavailable.
Store formula according to manufacturer instructions and follow recommended handling and discard times after opening.
For young children, choose familiar foods that are appropriate for their age and developmental stage.
Avoid foods that present choking hazards.
Older Adults
Some older adults may have difficulty opening containers, chewing certain foods, or preparing meals without assistance.
Consider easy-open packaging, suitable textures, and foods that meet their nutritional needs.
Keep a manual can opener that household members can use comfortably.
Food Allergies and Intolerances
If someone in your household has a food allergy, check every product label.
Do not assume that a product is safe simply because it resembles one you normally purchase.
Keep enough suitable alternatives in your emergency pantry so that everyone has adequate food.
Medical and Dietary Requirements
People managing diabetes, kidney disease, or other conditions may require particular dietary arrangements.
Emergency food planning should account for these requirements.
Where appropriate, discuss emergency nutrition needs with a qualified healthcare professional.
Pets
Pets need their own emergency food supply.
Store suitable pet food in secure packaging, along with feeding bowls, necessary supplies, and sufficient drinking water.
Check pet food dates and rotate supplies as needed.
Your household’s emergency drinking-water calculation should also account for pets.
Common Emergency Food Storage Mistakes to Avoid
Even a well-intentioned emergency food plan can become less useful if you overlook a few basic details.
Mistake 1: Buying Food Your Family Doesn’t Eat
Unfamiliar survival meals may seem convenient, but they can be expensive and hard to fit into everyday routines.
Choose familiar foods whenever possible.
Mistake 2: Counting Packages Instead of Servings
Ten cans do not necessarily provide ten complete meals.
Check serving sizes, calories, and what you need to make each meal adequate.
Mistake 3: Depending Entirely on Foods That Need Cooking
Dry rice, pasta, and beans are useful pantry staples, but they may be difficult to prepare during a power outage.
Include ready-to-eat alternatives.
Mistake 4: Forgetting Drinking Water
Some emergency foods require water for preparation.
Even ready-to-eat meals need a sufficient drinking-water supply.
Plan food and water together rather than treating them as separate concerns.
Mistake 5: Ignoring Dietary Requirements
A supply that does not accommodate allergies, medical needs, infants, or other household requirements may be unsuitable during an emergency.
Customize your food list before purchasing.
Mistake 6: Storing Food in Poor Conditions
Heat, moisture, pests, and damaged packaging can reduce food quality or create safety risks.
Use a suitable storage area and inspect it regularly.
Mistake 7: Forgetting to Rotate Supplies
Food that remains untouched for years may become stale, damaged, or unsuitable for use.
A simple first-in, first-out rotation system helps reduce waste.
Mistake 8: Overlooking Basic Equipment
A supply of canned food may be difficult to use without a manual can opener.
Other useful items may include disposable plates, utensils, and appropriate food-cleanup supplies.
Keep these with your broader household emergency kit.
Emergency Food Supply Checklist for Beginners
Use this checklist to review your household’s preparations.
- Calculate how many people need emergency food.
- Establish an initial three-day supply.
- Consider expanding to seven days or longer.
- Include foods that can be eaten without cooking.
- Check the actual servings and nutritional content on package labels.
- Include protein-rich foods, grains, fruits, and vegetables.
- Account for allergies and special dietary requirements.
- Store appropriate food for infants, children, and older adults.
- Include food and water for pets.
- Keep a reliable manual can opener.
- Store food away from excessive heat, moisture, pests, and chemicals.
- Inspect packaging and rotate suitable products regularly.
- Maintain a separate emergency drinking-water supply.
- Review your household’s emergency food plan periodically.
A simple checklist makes it easier to identify gaps without purchasing unnecessary supplies.
For a broader list of household essentials, consult our Emergency Supplies Checklist: What Every Home Should Have.
Frequently Asked Questions About Emergency Food Supplies
How much emergency food should I store per person?
Start with enough food to meet each person’s nutritional needs for at least three days.
Calculate the number of meals and snacks required, then check the actual servings and nutritional information on your chosen products.
Food quantities depend on age, activity, dietary requirements, and the types of food stored.
What are the best foods to keep for emergencies?
Useful choices include ready-to-eat canned beans, fish, chicken, crackers, peanut butter, canned fruits and vegetables, ready-to-eat cereal, and other shelf-stable foods.
Prioritize products that your household enjoys and can safely consume without refrigeration or extensive cooking.
Is a three-day emergency food supply enough?
Three days is a practical starting point, but longer disruptions may require additional food.
If your budget and storage space permit, consider building toward a seven-day or two-week supply based on local hazards and household needs.
Can I eat canned food without heating it?
Many commercially canned foods, including certain beans, vegetables, fish, and meats, are fully cooked and can be eaten without heating.
Always check the product label and follow preparation instructions.
Do not eat food from leaking, bulging, or otherwise seriously damaged cans.
How often should I replace emergency food?
Replacement depends on the food, packaging, storage conditions, and manufacturer instructions.
Review your supplies regularly, use suitable older items first, and replace them with fresh purchases.
A six-monthly pantry inspection is a practical maintenance habit.
Conclusion: Build a Practical Emergency Food Supply One Step at a Time
An emergency food supply is not about preparing for every possible disaster.
It is about making sure your household has dependable food when normal shopping, refrigeration, or cooking routines are interrupted.
Begin with a three-day reserve of familiar, shelf-stable foods.
Choose items that require little or no cooking, check actual serving quantities, and account for everyone in your household.
As your budget and storage space allow, gradually extend your supply.
Keep food in suitable conditions, inspect packaging, and rotate products into everyday meals whenever practical.
Most importantly, remember that emergency food and drinking water work together.
For detailed water-storage calculations, read our How Much Emergency Water Should You Store at Home? guide.
And if you’re building your household preparedness plan from the beginning, our Household Emergency Preparedness: A Complete Beginner’s Guide provides a broader framework.
A reliable emergency pantry doesn’t have to be large or expensive. It simply needs to be practical, safe, and suited to your household.
Start with the next few meals your family would need if shopping suddenly became impossible. Then build from there.