

Composting is one of the simplest ways to turn everyday kitchen scraps and garden waste into something useful. Instead of throwing away vegetable peels, dry leaves, and grass clippings, you can transform them into a natural soil amendment that helps your garden grow.
If you’re wondering how to start composting at home, the good news is that you don’t need expensive equipment, a large backyard, or gardening experience. A simple compost bin, a suitable location, and a basic understanding of what to add are enough to begin.
This beginner-friendly guide explains how composting works, which materials to use, how to maintain your compost pile, and how to avoid common mistakes.
What Is Composting, and How Does It Work?
Composting is the natural breakdown of organic materials into a dark, crumbly substance called compost.
Tiny organisms, including bacteria and fungi, break down food scraps, leaves, and other organic matter. As they work, they transform these materials into a stable soil amendment that can improve soil structure and help retain moisture.
Successful composting requires four essential ingredients:
- Brown materials: Carbon-rich materials such as dry leaves, shredded cardboard, and small twigs.
- Green materials: Nitrogen-rich materials such as vegetable scraps, coffee grounds, and fresh grass clippings.
- Water: Enough moisture to support the microorganisms responsible for decomposition.
- Air: Oxygen that allows the composting process to work efficiently.
When these ingredients are reasonably balanced, organic waste gradually becomes finished compost.
Unlike ordinary rotting waste, properly managed aerobic composting should not produce persistent unpleasant odors.
Why Start Composting at Home?
Composting offers several practical benefits for households interested in gardening, waste reduction, and everyday self-sufficiency.
1. Reduce household waste
Fruit and vegetable scraps, coffee grounds, and garden trimmings often make up a noticeable portion of household rubbish.
Composting lets you reuse many of these materials instead of sending them to landfills.
2. Instead of soil
Finished compost adds organic matter to soil, helping improve its structure, moisture retention, and overall growing conditions.
This can be particularly helpful in vegetable gardens, especially flower beds.
3. Reduce gardening expenses
Making your own compost can reduce the amount of commercially packaged soil amendments you need to purchase.
Although compost is not a complete replacement for every fertilizer, it can contribute to healthier soil over time.
4. Develop useful self-sufficiency skills
Composting fits naturally into a household that wants to grow some of its own food and make better use of available resources.
If you’re just beginning your gardening journey, our guide to starting a small backyard vegetable garden for beginners provides a useful companion to this composting project.
Step 1: Choose the Best Composting Method for Your Home
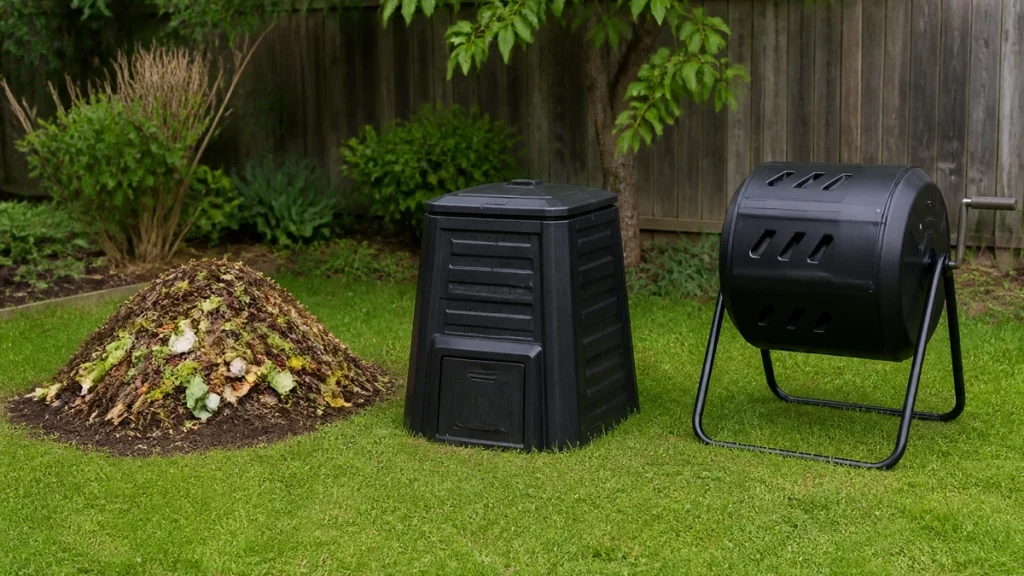
No single composting system suits every household. The right method ds on your available space, budget, and how much organic waste you produce.
Open compost pile
An open pile is one of the simplest and least expensive approaches.
You collect suitable organic materials in a designated backyard area and allow them to decompose while periodically mixing and moistening the pile.
Best for: Households with sufficient outdoor space and regular garden waste.
Advantages: Low cost, easy to expand, and suitable for larger quantities.
Limitations: Can look untidy and may attract animals if food scraps are exposed.
Enclosed compost bin
An enclosed compost bin keeps materials together in a more organized space.
Bins may be made from plastic, wood, or wire mesh. Some have lids and access doors for removing finished compost.wat
Best for: Beginners who want a tidy, manageable backyard composting system.
Advantages: Organized appearance, space efficiency, and easier containment of scraps.
Limitations: Some designs can be difficult to turn or empty.
Compost tumbler
A compost tumbler is a rotating container designed to make mixing easier.
Turning the compost distributes materials and introduces air.
Best for: Households with limited space that prefer an enclosed system.
Advantages: Convenient mixing and reduced exposure of food scraps.
Limitations: Higher initial cost, limited capacity, and possible drying out.
Worm composting
Worm composting, also called vermicomposting, uses suitable composting worms to process organic materials.
It can work well in smaller spaces when properly managed.
However, it requires mowith proper management of health, moisture, temperature, and suitable food materials.
Beginner recommendation: For a household with a small backyard, a simple enclosed compost bin is often the easiest starting point.
Step 2: Select a suitable location to start
Choosing the right location makes composting easier to manage.
Look for an area that:
- Has good drainage and does not regularly flood.
- Is convenient to reach from your kitchen or garden.
- Has access to water when materials become dry.
- Provides enough room to add and mix materials.
- Is reasonably protected from strong winds.
A compost pile can work in sunlight or shade. In hot climates, partial shade may help prevent excessive drying.
Avoid positioning an open pile directly against wooden structures or fences. Leave space for airflow and maintenance.
If you use a closed bin, follow the manufacturer’s placement instructions.
Step 3: Understand Green and Brown Compost Materials

One of the most important beginner composting skills is learning how to balance green and brown materials.
Despite their names, these categories refer mainly to their nutritional roles rather than their actual colors.
Green materials: Nitrogen sources
These materials generally contain more nitrogen and often have higher moisture content.
Examples include:
- Fruit and vegetable scraps
- Fresh grass clippings
- Coffee grounds and paper filters
- Fresh, healthy plant trimmings
- Suitable fresh garden waste
Green materials support the microorganisms that break down organic matter.
However, too many greens can make a compost pile wet, compacted, or unpleasant-smelling.
Brown materials: Carbon sources
Brown materials supply carbon and help maintain structure and airflow.
Examples include:
- Dry leaves
- Shredded plain cardboard
- Untreated wood chips
- Small dry twigs
- Shredded non-glossy paper
- Straw
Browns are particularly useful for balancing wet kitchen scraps.
What is the ideal green-to-brown ratio?
A practical starting point is approximately two to three parts brown materials for every one part green materials by volume.
For example, if you add one bucket of vegetable scraps, mix in roughly two or three similar-sized buckets of dry leaves or shredded cardboard.
This is a beginner-friendly guideline rather than an exact formula. Different materials, not different amounts of carbon, nitrogen, and moisture.
Watch the condition of your compost and adjust as needed.
Step 4: Know What You Can and Cannot Compost
Not everything that breaks down naturally belongs in a typical backyard compost pile.
The following table provides a practical starting point.
| Suitable for home composting | Best avoided in ordinary backyard compost |
|---|---|
| Vegetable and fruit scraps | Meat, fish, and bones |
| Coffee grounds and paper filters | Milk, cheese, and dairy products |
| Dry leaves and grass clippings | Oils, grease, and fatty foods |
| Shredded plain cardboard | Dog and cat waste |
| Small untreated twigs | Diseased plants |
| Crushed eggshells | Weeds containing mature seeds |
| Healthy plant trimmings | Treated or painted wood |
| Plain, non-glossy paper | Plastic and produce stickers |
Some commercially compostable products require industrial composting conditions. Do not assume that packaging labeled “compostable ” is suitable for your backyard bin.
When uncertain about a material, leave it out until you can verify that it is safe for home composting.
Step 5: Build Your First Compost Pile
Once you have selected a location and collected suitable materials, you can begin assembling your compost.
Start with a coarse base
Place approximately four to six inches of bulky brown materials at the bottom of the pile.
Small twigs, dry stalks, and coarse wood chips can help create spaces for airflow.
Add green materials
Place a modest layer of vegetable scraps, fresh grass clippings, or other suitable greens over the base.
Chop large pieces into smaller sections when practical. Smaller materials generally break down more quickly.
Cover with brown materials
Add a generous layer of dry leaves, shredded cardboard, or other browns.
Keep kitchen food scraps buried beneath the surface to discourage flies.
Moisten the materials
Add water if the pile feels dry.
The ideal moisture level is similar to a wrung-out sponge: damp but not dripping.
Avoid soaking the materials.
Continue building gradually
Add new materials as they become available, mixing greens with sufficient browns.
You do not need to fill your compost bin immediately.
A small compost pile may decompose more slowly than a larger one, but it can still produce useful compost.
Step 6: Maintain Your Compost Pile
Once your compost pile is established, it needs occasional attention.
Monitor three main things: moisture, airflow, and balance.
Check moisture regularly
If the pile is too dry, decomposition slows.
Add a little water and mix the materials when necessary.
If it is excessively wet, add dry leaves or shredded cardboard and improve airflow.
Turn the compost occasionally
Turning introduces oxygen and redistributes materials.
For a simple backyard pile, turning approximately every one or two weeks can be a reasonable starting routine, although the ideal frequency depends on the composting method.
A compost fork or garden fork is useful for this task.
You do not need to turn the pile every day.
Watch for temperature changes
Microorganisms generate heat as they break down organic matter.
Larger, well-managed piles may become noticeably warm, particularly near the center.
Smaller piles may remain relatively cool and still compost successfully.
Do not assume that a cool pile has failed. It simply needs time.
Keep fresh scraps covered
Whenever you add kitchen scraps, cover them with a generous layer of browns.
This simple habit helps reduce odors and discourages pests.
Step 7: Solve Common Composting Problems
Most beginner composting problems can be corrected by adjusting moisture, airflow, or tfixedals being added.
| Problem | Possible cause | Practical solution |
|---|---|---|
| Rotten smell | Too wet or insufficient oxygen | Add dry browns and turn the pile |
| Ammonia-like smell | Too many nitrogen-rich greens | Mix in more carbon-rich materials |
| Compost is very dry | Insufficient moisture | Add water gradually |
| Compost breaks down slowly | Cold weather, dry conditions, or coarse materials | Check moisture, chop materials, and allow more time |
| Flies around the pile | Exposed food scraps | Bury scraps beneath dry browns |
| Rodents or other animals | Accessible food waste | Remove attractants and secure the bin |
| Pile does not heat up | Small pile or insufficient microbial activity | Check moisture and material balance |
A persistent foul smell usually indicates that something needs adjustment.
A healthy compost pile generally has a mild, earthy smell rather than a strong rotten odor.
Step 8: How Long Does Composting Take?
Composting time varies depending on the materials, climate, pile size, and maintenance routine.
A well-managed backyard compost pile may produce usable compost in approximately three to five months.
A less frequently maintained pile can take a year or longer.
Several factors affect the speed of decomposition:
Material size: Chopped and shredded materials usually break down faster than large pieces.
Moisture: Microorganisms need water, but excess moisture can restrict oxygen.
Airflow: Occasional turning supports aerobic decomposition.
Temperature: Warm conditions generally encourage biological activity, while cold weather slows the process.
Material balance: A suitable mixture of greens and browns supports decomposition.
There is no need to rush the process. Producing stable, mature compost is more important than finishing quickly.
Step 9: How to Tell When Compost Is Ready
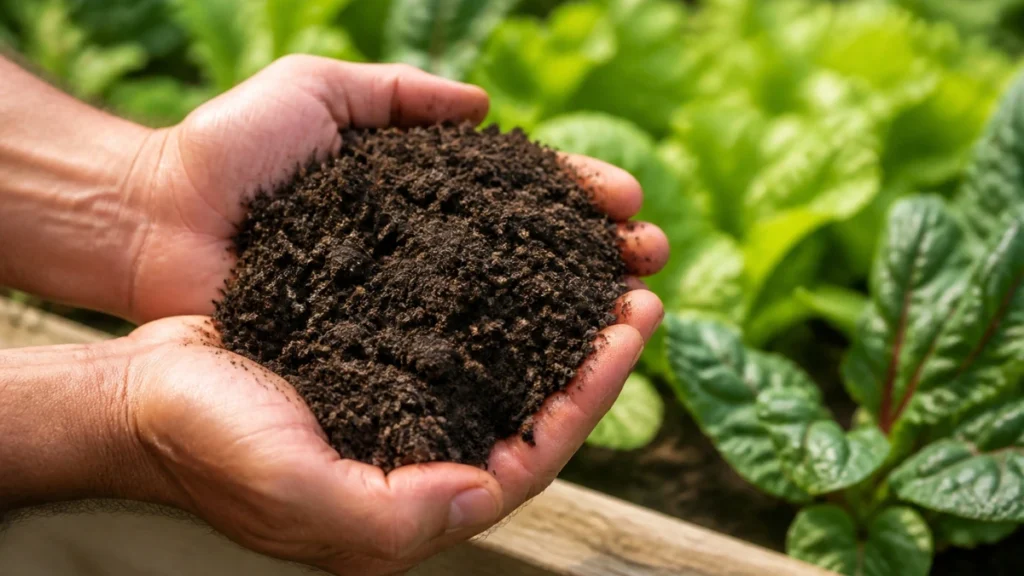
Finished compost has several recognizable characteristics.
It should:
- Be dark brown and crumbly.
- Smell pleasantly earthy.
- Have few recognizable food scraps remaining.
- No longer become noticeably hot after turning.
- Have a reasonably uniform texture.
Small pieces of wood, eggshells, or other slow-decomposing materials may remain.
You can sift these out and return them to an active compost pile.
After active decomposition ends, allow the compost to cure before using it. The EPA recommends a curing period of at least four weeks.
Avoid applying unfinished compost directly around delicate seedlings, since actively decomposing materials may interfere with healthy growth.
Step 10: Use Finished Compost in Your Garden
Once your compost has matured, you can put it to work in several ways.
Improve vegetable gardens
Mix finished compost into the upper portion of your garden soil before planting.
It adds organic matter and can improve moisture retention and soil structure.
Add compost to raised beds
Finished compost can be incorporated into raisYouures.
However, compost should generally be combined with suitable soil or growing media rather than used as the only growing material.
Use as a surface amendment
Spread a modest layer of finished compost around established plants, keeping it away from direct contact with stems.
This allows organic matter to become incorporated into the soil over time.
Support future planting
If you are planning a new vegetable garden, homemade compost can become a valuable resource for preparing planting beds.
Our small backyard vegetable garden guide for beginners explains how to choose a location, prepare the growing area, and select suitable vegetables.
A Simple Four-Week Composting Starter Plan
You don’t need to master every detail before beginning.
Use this manageable four-week plan to start a composting routine.
| Week | Your task |
|---|---|
| Week 1 | Choose a location, set up a bin, and collect dry brown materials |
| Week 2 | Begin adding suitable kitchen scraps and cover them with browns |
| Week 3 | Check moisture, inspect for odors, and turn the pile if appropriate |
| Week 4 | Continue adding balanced materials and adjust your routine based on the pile’s condition |
At the end of four weeks, your compost probably will not be finished.
The goal is to establish a manageable system that you can maintain over the following months.
Frequently Asked Questions About Composting at Home
Can I start composting without a compost bin?
Yes. You can create an open compost pile in a suitable backyard location. However, a secure enclosed bin may be preferable where rodents, wildlife, or limited space are concerns.
Does composting attract rats?
Poorly managed compost can attract rodents, particularly when food scraps are exposed. Avoid meat, dairy, and oily foods, bury suitable scraps beneath brown materials, and use a secure bin where needed.
Can I compost during winter?
Yes. Composting can continue in cold weather, although decomposition often slows considerably. A larger pile or insulated composting system may retain heat better.
Can I put eggshells in compost?
Yes. Crushed eggshells can be added to a home compost pile. They often break down slowly, so small pieces may remain visible for some time.
Do I need to buy compost starter?
Usually not. The microorganisms needed for composting are naturally present in organic materials and the surrounding environment. A properly balanced pile generally does not require a commercial starter product.
Can I compost in a small backyard?
Absolutely. A compact, enclosed compost bin or tumbler can work well for smaller gardens. Choose a system that fits your space and the amount of waste your household produces.
Is compost the same as fertilizer?
No. Compost primarily serves as a soil amendment, improving organic matter and soil conditions while contributing some nutrients. It does not necessarily provide the precise nutrient balance that particular plants may require.
Final Thoughts: Start Small and Keep It Simple
Learning how to start composting at home is a practical first step toward reducing waste and improving your garden soil.
You do not need a sophisticated system or expensive equipment. Begin with suitable kitchen scraps, a reliable supply of dry brown materials, and a manageable composting location.
As you become familiar with the process, you can adjust your routine to suit your household and garden.
Composting also complements other everyday self-sufficiency skills, particularly growing vegetables at home.
The most important step is simply getting started. With a little patience and regular attention, materials that would otherwise become household waste can eventually become a useful resource for your garden.
References and Further Reading
- U.S. Environmental Protection Agency — Composting at Home:
- U.S. Environmental Protection Agency — Approaches to Composting:
- U.S. Environmental Protection Agency — Composting: