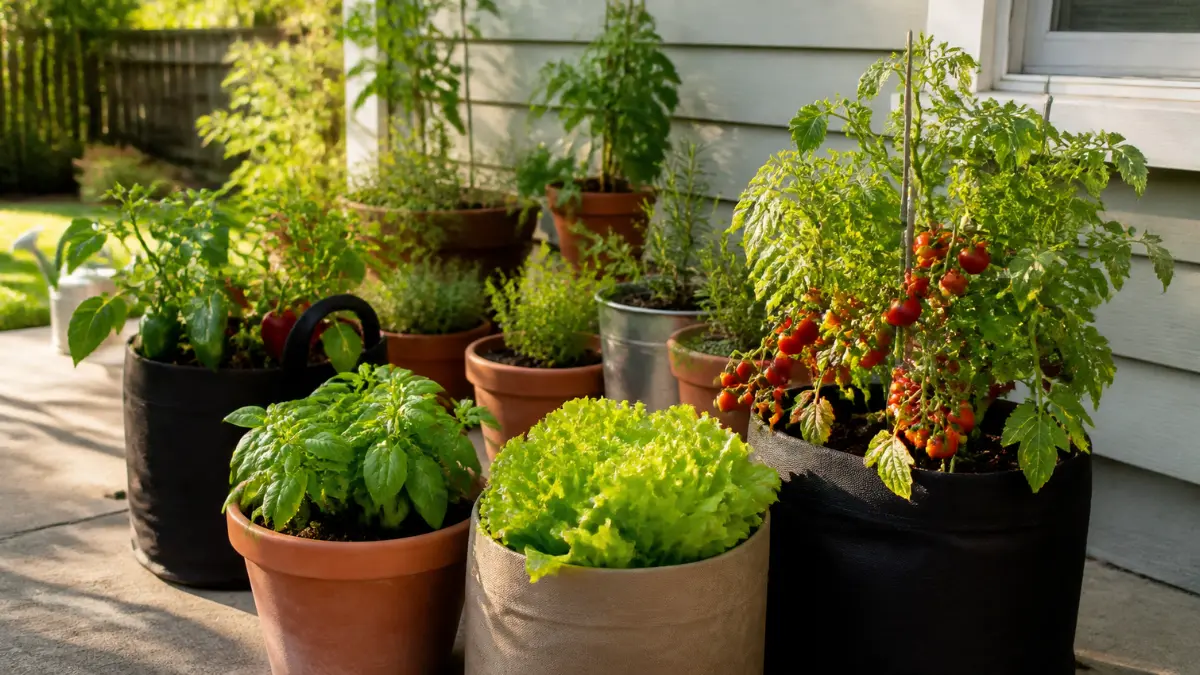
You don’t need a large backyard or a traditional garden bed to grow fresh vegetables at home. A sunny patio, balcony, deck, or small outdoor corner may be enough to start a productive vegetable garden.
Growing vegetables in containers is one of the most accessible ways for beginners to develop practical gardening skills. With the right pots, quality potting mix, and regular care, you can grow lettuce, tomatoes, peppers, radishes, herbs, and other useful crops in limited space.
Container gardening also gives you greater control over growing conditions. You can choose where to place plants, adjust watering, and move smaller containers as needed.
However, successful container gardening takes more than just planting seeds in a pot. Choosing the right container size, providing adequate sunlight, and managing moisture are especially important.
This beginner’s guide explains how to grow vegetables in containers step by step, including which crops to choose, how to plant them, and how to keep your small garden healthy.
Official Source: University of Maryland Extension — Growing Vegetables in Containers. Suitable crops and beginner considerations.
Why Grow Vegetables in Containers?
Container vegetable gardening involves growing edible plants in pots, grow bags, window boxes, or other suitable containers instead of directly in garden soil.
It is especially useful for people with limited outdoor space or who want to start gardening without creating permanent garden beds.
Growing some of your own vegetables is one useful household skill. Our complete beginner’s guide to household emergency preparedness covers additional ways to prepare for everyday disruptions.
Advantages of container gardening
Suitable for small spaces. Many vegetables can grow in relatively compact areas, making containers practical for patios, balconies, and small yards.
Lower initial commitment. Beginners can start with two or three containers rather than investing in an entire garden.
Greater control over growing conditions. You can choose the potting mix, adjust watering, and place containers where plants get the right sunlight.
Flexible arrangement. Smaller containers can be moved to accommodate changing weather or household needs.
Useful gardening experience. Growing vegetables at home helps you learn about plant growth, seasonal conditions, watering, and food production.
Container gardening does have limitations. Pots dry out faster than garden beds, plants have limited root space, and yields depend on growing conditions.
Still, it offers a practical starting point for households interested in everyday self-sufficiency.
For readers with more outdoor space, our article How to Start a Small Backyard Vegetable Garden for Beginners explains how to establish a traditional garden.
Step 1: Choose the Best Vegetables for Containers
Not all vegetables suit small containers equally well.
Some crops grow compactly and mature quickly. Others develop extensive roots or large vines and need significantly more space.
For beginners, the best choices are usually vegetables that are relatively easy to manage and well suited to the available growing area.
Easy vegetables to grow in containers
| Vegetable | Suggested starting container | Growing considerations |
|---|---|---|
| Leaf lettuce | 1–2 gallon pot or window box | Prefers cooler conditions and regular moisture |
| Radishes | 1–2 gallon container, adequately deep | Fast-growing; avoid overcrowding |
| Bush beans | 2–3 gallon container or larger | Choose compact bush varieties |
| Cherry tomatoes | 5-gallon pot or larger | Needs strong sunlight and support |
| Peppers | 5-gallon pot | Prefers warm weather |
| Carrots | Deep container, usually 2 gallons or larger | Choose shorter varieties for limited depth |
| Swiss chard | 2–3 gallon pot | Leaves can be harvested repeatedly |
| Compact cucumbers | 5-gallon pot or larger | Often benefits from a trellis |
These are practical starting sizes, not universal requirements. Container dimensions, crop varieties, and the number of plants affect how much root space is needed.
The University of Maryland Extension provides crop-specific container size recommendations and advises beginners to choose compact, bush, or dwarf varieties where possible.
Three especially good choices for beginners
Leaf lettuce: A useful first crop because it grows in relatively shallow containers and can be harvested gradually.
Radishes: Good for gardeners who want to see the full growing cycle quickly.
Bush beans: A manageable choice for sunny locations, as long as the container is large enough.
Tomatoes and peppers are also popular, but they generally require more attention to sunlight, watering, feeding, and support.
Beginner tip: Start with two or three crops rather than attempting to grow everything at once. This makes it easier to understand each plant’s needs.
Step 2: Choose the Right Containers

Container size is one of the most important factors affecting plant growth.
A pot that is too small can restrict roots, dry out quickly, and limit the plant’s access to water and nutrients.
Choose containers based on the crop’s mature size, not just the seedling’s size.
Common container options
Plastic pots: Lightweight, widely available, and generally good at retaining moisture. Choose sturdy containers suitable for outdoor use.
Fabric grow bags: Often affordable and easy to store between growing seasons. They allow air to reach the roots but may dry out faster.
Terracotta pots: Attractive and porous, but moisture evaporates through their walls, so they may require more frequent watering.
Wooden planters: Useful for larger arrangements. Choose materials suitable for growing edible crops and avoid wood treated with potentially harmful chemicals.
Repurposed food-grade containers: Clean buckets or other appropriate containers may work if they have adequate drainage and have never held hazardous substances.
Drainage is essential
Most conventional vegetable containers need drainage holes at the bottom.
Without adequate drainage, water may accumulate around the roots and contribute to root rot.
Check that excess water can escape freely.
A common gardening misconception is that placing gravel or stones at the bottom of a pot improves drainage.
In fact, university extension guidance says a gravel layer doesn’t improve drainage and can reduce space for healthy root growth.
Instead, use a suitable potting mix and properly designed drainage holes.
Official Source: University of Maryland Extension — Growing Vegetables in Containers and Salad Tables. Container sizes, growing media, and drainage.
A note about balcony gardening
Large containers filled with moist potting mix can become surprisingly heavy.
Before creating a balcony garden, check building rules, weight restrictions, and whether the space is structurally suitable.
Position containers securely, protect drainage outlets, and prevent water from dripping onto neighboring properties.
Do not attach heavy planters to railings unless the installation is specifically designed and approved for that purpose.
Step 3: Select the Right Potting Mix
Healthy vegetable plants need a growing medium that provides moisture, nutrients, oxygen, and physical support.
Ordinary garden soil is often unsuitable for containers because it can become compacted and drain poorly.
A quality potting mix is usually a better choice.
What makes a good container potting mix?
Look for a mix that is:
- Lightweight and well aerated.
- Able to retain moisture without remaining waterlogged.
- Suitable for edible plants.
- Free from obvious contamination.
- Appropriate for the vegetables you intend to grow.
Commercial potting mixes may contain ingredients such as coconut coir, peat moss, composted bark, perlite, and vermiculite.
These materials help balance moisture retention and drainage.
Should you add compost?
Mature, well-prepared compost can add organic matter and nutrients to suitable potting mixes.
However, avoid filling containers entirely with dense compost or ordinary garden soil.
A balanced commercial potting mix is often the simplest option for beginners.
If you make compost at home, use only fully matured material suitable for food gardening.
Our guide, How to Start Composting at Home for Beginners, covers the basics.
How to fill the container
- Check that the container drains well.
- Moisten dry potting mix before use.
- Fill the container loosely without compressing the mix.
- Leave approximately one inch of space below the rim.
- Level the surface gently.
- Water lightly before or after planting, as appropriate.
Avoid pressing the mix down firmly. Vegetable roots need air as well as moisture.
Step 4: Find a Location With Enough Sunlight
Sunlight provides the energy plants need for photosynthesis and healthy growth.
Most fruiting vegetables, including tomatoes, peppers, and cucumbers, perform best with at least six hours of direct sunlight daily. Many benefit from 8 or more hours.
Leafy vegetables such as lettuce and Swiss chard can tolerate less direct sunlight, especially in hot weather.
Check your available sunlight
Observe your intended growing area throughout the day.
Note when sunlight reaches the location and when buildings, trees, or fences create shade.
A patio that appears sunny at midday may receive only a few hours of direct light.
Consider seasonal changes
Sunlight patterns change with the seasons.
A balcony that receives strong summer sunlight may become shaded during winter because the sun follows a lower path across the sky.
In hot regions, some vegetables may benefit from protection against intense afternoon heat.
Protect plants from wind
Balconies and exposed patios can experience strong winds.
Wind can dry out potting mix, damage leaves, and overturn tall containers.
Use stable containers, provide suitable plant supports, and select locations that balance sunlight with protection from excessive wind.
Step 5: Plant Seeds or Seedlings

Once your containers and potting mix are ready, you can begin planting.
You have two main options: sow seeds directly or buy young plants.
Starting from seeds
Seeds are often economical and offer a wide selection of vegetable varieties.
Direct sowing works particularly well for crops such as:
- Radishes.
- Carrots.
- Bush beans.
- Leaf lettuce.
- Some leafy greens.
Follow the seed packet instructions for planting depth, spacing, and seasonal timing.
Seeds planted too deeply may struggle to emerge, while overcrowded seedlings compete for water, nutrients, and light.
After germination, thin seedlings where necessary.
Starting with seedlings
Purchased seedlings can be convenient for tomatoes, peppers, and other crops that require a longer growing season.
Choose plants with healthy leaves, sturdy stems, and no obvious signs of pests or disease.
When transplanting:
- Water the seedling if the root ball is dry.
- Prepare a planting hole in the potting mix.
- Gently remove the plant from its nursery container.
- If necessary, carefully loosen tightly circling roots.
- Place the plant at the appropriate planting depth.
- Gently firm the mix around the roots.
- Water thoroughly.
Plant most seedlings at about the same depth they grew at, though tomatoes are a notable exception and can often be planted deeper.
Harden off indoor-grown seedlings
Seedlings raised indoors need gradual exposure to outdoor sunlight, wind, and temperature changes.
This process, known as hardening off, typically takes about one to two weeks.
Start in a protected outdoor area and gradually increase exposure.
Don’t transplant tender warm-season vegetables outdoors until local frost risk has passed and temperatures are suitable.
Step 6: Water Container Vegetables Correctly
Watering is one of the most important—and sometimes most challenging—parts of container gardening.
Plants in containers have limited access to moisture because their roots cannot spread into surrounding soil.
During hot or windy weather, pots may dry out quickly.
However, watering too frequently can also cause problems.
Official Source: University of Maryland Extension — Maintaining Container-Grown Vegetables. Watering and fertilizing.
Water conservation can also become part of your gardening routine. Our guide to collecting rainwater for your garden explains how to gather and use rainwater for non-drinking purposes.

How to tell when vegetables need water
Check the potting mix rather than following a rigid daily schedule.
Insert your finger about an inch into the growing medium.
If the upper layer feels dry, check whether the plant needs watering. If it stays moist, you may not need to water yet.
The appropriate frequency depends on:
- Container size and material.
- Plant type and maturity.
- Temperature and sunlight.
- Wind exposure.
- Potting mix composition.
- Recent rainfall.
Small containers in full summer sun may need daily attention, while larger containers in cooler weather may remain moist longer.
How to water properly
Apply water slowly around the base of the plant.
Keep watering until water drains from the bottom of a conventional container.
Let excess water escape and empty collection saucers when needed.
Avoid repeated shallow watering that wets only the surface.
Should you use self-watering containers?
Self-watering containers use a reservoir to supply moisture to the growing medium.
They can be useful for busy households or locations where containers dry quickly.
However, they still require monitoring, and you must maintain their reservoirs according to the manufacturer’s instructions.
They are helpful options, not essential purchases.
Step 7: Feed Your Vegetables Without Overfertilizing
Vegetables need nutrients to produce healthy leaves, roots, flowers, and fruits.
Container-grown plants depend on the limited nutrients available in their potting mix.
Some commercial mixes include fertilizer to support early growth, but you may still need to feed them later.
Choosing fertilizer
For beginners, a fertilizer labeled for container vegetables is usually sufficient.
Options include:
- Slow-release granular fertilizers.
- Water-soluble vegetable fertilizers.
- Suitable organic fertilizers.
Follow the product instructions carefully.
Long-season crops such as tomatoes, peppers, eggplants, and cucumbers may require regular feeding during active growth.
The University of Maryland Extension notes that some long-season container vegetables may benefit from light fertilization approximately every two weeks, depending on the growing medium and fertilizer used.
This is not a universal schedule. Fertilizers vary considerably in concentration and release rate.
Avoid excessive fertilizer
Adding more fertilizer does not necessarily produce more vegetables.
Overfertilization can damage roots, cause excessive salt accumulation, or encourage leafy growth at the expense of fruit production.
Start with the recommended amount and observe how your plants respond.
Step 8: Support Plants and Manage Common Problems
Container gardens require regular observation, but most routine maintenance is straightforward.
Provide support where necessary
Tomatoes, cucumbers, and some other vegetables may require stakes, cages, or trellises.
Install supports early so you don’t damage established roots later.
Choose supports that are stable and appropriate for the mature plant.
Watch for pests
Common problems may include aphids, caterpillars, whiteflies, and spider mites.
Inspect the undersides of leaves regularly.
Remove affected leaves where appropriate, use gentle physical controls when practical, and identify the pest before choosing any treatment.
Avoid applying household chemicals or pesticides not labeled for the crop and intended use.
Recognize watering problems
Yellowing leaves, wilting, or slow growth can have several causes.
Before adding fertilizer or applying treatments, check the potting mix.
Persistent wetness may indicate poor drainage or overwatering.
Repeated dryness may mean the container is too small or the plant is exposed to excessive heat.
Avoid overcrowding
Small seedlings can look attractive when planted closely together, but mature vegetables need space.
Overcrowding restricts airflow and increases competition for water and nutrients.
Follow crop-specific spacing recommendations even when gardening in containers.
Step 9: Plan Your Growing Season
The best planting time depends on your climate and the vegetables you choose.
In much of the United States and Canada, outdoor gardening follows a seasonal pattern influenced by frost dates and summer temperatures.
Cool-season vegetables
Examples include:
- Lettuce.
- Radishes.
- Spinach.
- Peas.
- Kale.
These crops generally prefer cooler growing conditions.
They may suit spring or autumn planting, depending on your region.
Warm-season vegetables
Examples include:
- Tomatoes.
- Peppers.
- Cucumbers.
- Bush beans.
- Eggplants.
These plants generally need warmer temperatures and should not be exposed to damaging frost.
Check your local growing conditions
Before planting, consult your regional agricultural extension service or a reliable local gardening calendar.
A gardener in southern Florida will have a very different planting schedule from someone in Ontario or Minnesota.
For Canadian readers, local frost dates and the length of the frost-free growing season are especially important.
Container gardening can offer flexibility because you can move smaller pots temporarily, but moving a container indoors doesn’t automatically provide enough light or suitable growing conditions.
Official Source: University of Maryland Extension — Planting Vegetables in Containers. Seed planting and transplanting.
Step 10: Harvest Vegetables at the Right Time
Harvesting is one of the most rewarding parts of growing vegetables at home.
Different crops require different harvesting methods.
Leafy vegetables
Harvest many lettuce and Swiss chard varieties by removing mature outer leaves while letting the center keep growing.
Avoid removing too much foliage at once.
Radishes
Harvest when roots reach the variety’s expected size.
Leaving radishes in the soil too long may affect their texture and eating quality.
Tomatoes
Harvest according to the variety’s ripeness characteristics.
Color, firmness, and overall appearance help indicate maturity.
Beans
Pick pods when they reach the recommended size and remain tender.
Regular harvesting can encourage continued production in wide varieties.
Keep simple gardening notes
Record what you planted, when you planted it, how much sunlight the location receives, and which crops perform well.
These observations can help improve future planting decisions.
A successful container garden develops through experience, not through perfect results on the first attempt.
How to Start a Container Vegetable Garden on a Small Budget
You don’t need a large collection of gardening equipment.
For a simple beginner setup, consider:
- Two or three suitable containers with drainage.
- Quality potting mix.
- Seeds or healthy seedlings.
- A watering can or other suitable watering method.
- A small hand trowel.
- Basic plant supports if needed.
Choose inexpensive but appropriate containers instead of buying decorative planters right away.
A practical first garden might consist of one pot of leaf lettuce, one container of bush beans, and one larger pot of cherry tomatoes.
Choose crops based on the sunlight and space you actually have.
As your experience grows, you can add more containers, experiment with varieties, and improve your growing setup.
Container gardening can supplement household meals and build useful skills, but a small garden shouldn’t replace a household’s normal food supply.
Common Container Vegetable Gardening Mistakes
Choosing pots that are too small
Small containers restrict root growth and dry out quickly.
Match container size to the mature crop.
Using ordinary garden soil
Dense garden soil can compact and drain poorly in containers.
Use a suitable potting mix instead.
Growing vegetables without enough sunlight
Fruiting crops often struggle with inadequate sunlight.
Observe the location before selecting vegetables.
Watering on a fixed schedule
Daily watering isn’t always necessary, and sometimes it isn’t enough.
Check moisture conditions and adjust accordingly.
Adding gravel to improve drainage
Gravel layers do not solve drainage problems and can reduce usable root space.
Choose containers with proper drainage holes.
Planting too many crops at once
Starting with numerous vegetables can make maintenance difficult.
Begin with a few manageable crops.
Ignoring local seasons
Even healthy seedlings may fail if you plant them outdoors in unsuitable temperatures.
Follow local planting guidance.
Beginner’s Container Vegetable Gardening Checklist
Use this checklist before planting your first vegetables.
- I have identified a suitable growing location.
- I have checked how many hours of sunlight it receives.
- I have selected vegetables appropriate for my climate.
- My containers are large enough for mature plants.
- The containers have adequate drainage.
- I have purchased suitable potting mix.
- I know the correct planting depth and spacing.
- I have a practical watering routine.
- I have selected fertilizer if needed.
- I have arranged supports for climbing or tall plants.
- I know when to expect the first harvest.
Healthy container plants depend on a suitable growing medium. If you’re interested in producing your own organic material, see our beginner’s guide to composting at home.
Frequently Asked Questions
What vegetables are easiest to grow in containers?
Leaf lettuce, radishes, bush beans, Swiss chard, and compact tomato varieties are popular choices. The best option depends on your available sunlight, container size, and growing season.
Can vegetables grow in containers without a backyard?
Yes. Many vegetables can grow on patios, decks, balconies, and other suitable outdoor spaces. Adequate sunlight, drainage, water, and safe container placement are essential.
How deep should vegetable containers be?
The required depth varies by crop. Leafy vegetables may grow in relatively shallow containers, while carrots, tomatoes, and other plants require more root space. Check both container depth and total volume.
Do container vegetables need fertilizer?
Most container vegetables eventually need additional nutrients because the growing medium has limited reserves. Use fertilizer appropriate for edible crops and follow the label instructions.
How often should you water container vegetables?
There is no universal schedule. Watering depends on the crop, container size, weather, and potting mix. Check moisture regularly and water thoroughly when needed.
Can I reuse potting mix next year?
You can sometimes reuse potting mix if it is free of significant pest or disease problems. Remove old roots and debris, assess its structure, and replenish nutrients as appropriate. Replace mix associated with serious disease problems.
Can I grow vegetables in containers during winter?
Some cool-season crops may grow outdoors in mild winter climates. In colder regions, outdoor winter gardening usually needs extra protection, and indoor growing may need supplemental lighting.
Final Thoughts
Growing vegetables in containers is a practical way to begin producing some of your own food, even when outdoor space is limited.
You don’t need a large garden, expensive equipment, or years of experience.
Start with a few suitable vegetables, choose containers with enough root space, use good potting mix, and place your plants where they get adequate sunlight.
Pay particular attention to watering, because moisture management is one of the most important factors in container gardening.
As you gain experience, you can experiment with additional crops, larger containers, and seasonal planting.
A small container garden may not provide complete food self-sufficiency, but it can produce fresh vegetables, reduce some reliance on purchased produce, and help you develop valuable everyday gardening skills.
If you have enough outdoor space for a larger growing area, our guide to starting a small backyard vegetable garden for beginners explains how to plan and establish a simple garden.